Category Archives: Techniques

Are inexpensive “steadycam” camera stabilizers worth it?

Anyone who has shot video for a while eventually wants a way to create

English: A simple steadycam Deutsch: Eine simp...
Image via Wikipedia

smoother handheld shots. I do a lot of my shooting while on my feet and walking, just the type of activity for which “steadicam” (steadycam) units are built.

But do inexpensive camera stabilizers deliver real value?

I  have not tested them but this guy has and he suggests they are not worth the money relative to the alternatives (yes, there are alternatives!):

For example, I use either my Manfrotto tripod and video head (about 8.5 pounds) or my monopod with a 3 or 4 pound weight at the bottom and get good results. I also have a home made setup with some pieces of pipe from the plumbing shop and a 2 1/2 or 5 pound weight at the bottom – this works best of all! For the monopod weight I use the athletic weight straps designed for walkers and runners. These “rollup” around the base of the monpod and are held in place with Velco linings. Available at any sporting goods store.

The trick is not so much the equipment but how you use it. First, you need a really wide angle lens. I use a c-mount 4mm lens on my GH-2, which works out to about a 21mm full frame equivalent lens. A lot of the really smooth walking scenes you see on TV or the Internet are often done with extreme wide angle lenses, such as a 16mm full frame equivalent. Wide angle lenses make the biggest difference and you are probably better off investing in a good wide angle lens than steady cam.

Heavier cameras also stabilized better than lighter ones. I get better results using my Canon XH A1 (about 5 pounds) than the little GH-2. But you will get physically tired, faster, with the heavier camera (I’ve carried the XH A1, on an 8.5 pound tripod, with a 3 pound weight, for several miles while shooting a parade. Do remember to do strength conditioning starting months in advance!)

Second, you need to learn how to walk, and this takes practice. Bend your knees, may be tilt slightly forward and hold your arms out slightly bent. Roll your feet as you walk (known as “roll stepping”). Walking backwards can be smoother than walking forwards.

Third, you can apply motion stabilization in your video editor. Most software now has good to very good stabilization algorithms. If you do this, use the minimum stabilization possible (too much and you end up cropping or re-sizing your original image and it ends up looking strange).

A good stabilizer, however, when properly used, is going to produce better results than the simple monopod or tripod with a weight. The question of you is, “What is your budget?” and “How often will you use it?”

Update: I have an idea for a simple add on to a monopod that may decouple many walking movements between the camera operator and the camera. I have some parts on order and will let you know how it turns out – if it runs out okay 🙂

Enhanced by Zemanta

Intel buys video patents from RealNetworks

RealNetworks, makers of the Real Player, have sold video-related patents and apparently a video codec development team, to Intel: Intel bolsters video patent portfolio with purchase from RealNetworks — Engadget.

Clearly, Intel wants to ramp up some video offerings. Years ago, before Youtube days, I experimented with streaming online video using Flash, Real, Quicktime and Windows Media.

My goal, then, since it ran on my own servers, was to minimize the bit rate. Real’s codec generally did best on the tests that I did, back on those long ago days. Later, when I did a test where I had more bits to play with, one-pass Flash did best on retaining fine detail, although I later found I could get almost the same detail using two-pass H.264.

Each codec has advantages and disadvantages. Flash took a long time to encode, but so does two-pass H.264; Flash also needed a separate video player.  Real’s technology was easy to work with and did a good job on most things I threw at it but needed its own Real Player. Windows Encoder was okayran only on Windows in the Windows Media Player.  Quicktime was easy to use but its encoding was slow and you needed the QT player installed.

Today, most everything just uses H.264 as the industry standard so all of the above no longer matters much!

Converting individual .MTS AVCHD files on Mac OS X

I have deleted much of this original post since it was not that useful.

Until Final Cut Pro X, Apple did not support AVCHD file formats well. Importing an AVCHD file involved a time consuming and file expanding conversion from AVCHD to either Apple Intermediate Codec (AIC) or ProRes codec.  The files are often 3 to 5x larger than their originals. The only benefit was the editing was faster than if the files were still in AVCHD format. And you had to import from the original camera folders – the whole package – you could not import individual .mts files.

Since FCP cannot import individual MTS files (not part of the original file folder layout), I came up with some alternatives.

Option 1 – ACCESS to FAST INTERNET – TRIM EDITS

If you have a very fast Internet connection, just drag the .mts file directly from the camera and upload to Youtube.  When the upload is finished and processing at Youtube is finished, you can use Youtube’s new editing tools to trim your video.

Cons

  • Your files are going be encoded (in the camera) at data rates of 17 to 24 Mbps, which means they will be large. If you have a long video or a slow Internet connection, this may not be the preferred method.

Option 2 – Converting to MP4

Use SmartConverter (free version is okay for this) to extract the MP4 video stream that is hidden inside the AVCHD stream.  The conversion will take seconds or tens of seconds – its fast! – and the file will appear in Movies\SmartConverter.  No transcode has taken place – what you have in your MP4 file is the original bits hidden in the AVCHD file. You can edit the MP4 file but rendering is really slow.

Option 3 – Use FCP7 to Log and Transfer

Standard feature of FCP. Requires the original full camera folder layout. Does not work with individual .mts files.

Option 3A – Use iMovie 8 or newer

Import the files and convert them to huge AIC files. Does not work with individual MTS files.

Option 4 – NEED to convert a single MTS file

Use VoltaicHD from Shedworx.com if you need to convert individual MTS files.

Option 4 A:

Use SmartConverter to convert the .mts to a .mp4 or mov file containing h.264.

Open clip in QT7 Pro (doesn’t seem to work in QT X). Trim as needed. Export to ProRes 422 (LT).

Import clip into FCP and add titles, transitions, overlays, etc, as needed.

Export to Elgato Turbo.264 HD device for fastest conversion to an mp4 file for upload.

Option 4B – Use Turbo.264 HD

You can now use the Turbo.264 HD software to import directly from the camera (AVCHD), and you can mark some editing/trim locations. Turbo.264 HD will import, cut as desired, then re-assemble the pieces into your desired .mp4 output file. See the instruction manual for details.

If you do not have a quad core processor and you do a lot of conversions of video to 720p (in particular) or 1080p, Turbo.264 HD is a great product. It really does speed up the conversion process quite a bit. You can also batch up a whole set of files to convert, then walk away while it does all the work. Keep in mind that the maximum mp4 output bit rate is limited 10 Mbps. That’s fine for 720p but not so good for much 1080p video.

Why not use the famous MPEG Streamclip? Every time I tried to output through the Turbo 264 device, the file ended up with the wrong dimensions.

Bottom line – its possible to work with individual .MTS files. Would be nice of Apple and others had direct AVCHD support without doing file conversions or FCP X, which was late to the game. I do not have FCP X and do not plan to install on my notebook as it is not compatible with my FCP7 projects.

Enhanced by Zemanta

Shot more 3D video today

Shot using two Lumix GH-2 cameras. Edited in Magix Movie Edit MX Pro (version 18).

Here is the red/cyan anaglyph version. Requires red/cyan glasses and best to watch in 1080p.

Here is the Youtube multiple format version. Click on 3D in the viewer bar, at bottom right, to select your preferred viewing format. When I watched this, the red/cyan version seemed seriously misaligned versus my native red/cyan version, above.

A 3D Camera Rig

Español: Cámara de TV en 3D con las cámara ind...
Image via Wikipedia

Last night I built an aluminum 3D camera rig that holds two cameras for either still or video photography. My own interest is in shooting 3D video.

The rig is small, light weight, easy to transport and will hold any modest sized still or video camera. I stole the construction idea from someone else and will pass all that along “soon”.

I hope to “soon” start shooting 3D video with two cameras. With family events, business travel looming, starting to write my M.S. thesis in software engineering, and bad weather, having a chance to put it all to use and test it out may be a while yet!

But sometime in the future, I hope to share some cool 3D stereoscopic videos. Get your red-cyan glasses ready!

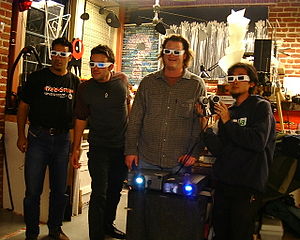
English: Strasser, Mike. Stanford University. ...
Image via Wikipedia
Enhanced by Zemanta